Update: If you are looking for Configurable Swatches on Magento 2, please visit our Magento 2 article here.
Creating color swatches on your Magento eCommerce website can be time-consuming, but it pays off with higher sales. You are more likely to make an online sale when options are right there on the product page. You will miss out on sales if you count solely on “related products.” Making individual products for each variation in color, fabric and size can be a maintenance nightmare. Configurable swatches in Magento 1.9.1 are a new feature, and this tutorial will walk you through setting them up.
You are not limited to just color, fabric and size. Configurable swatches in Magento can be any type of attribute, and you can create your own. You can use swatches on the individual product page, in the product lists and in layered navigation. When the site visitor clicks a swatch, the product image can update instantly to show exactly what the product looks like with that attribute. This helps increase sales by increasing consumer confidence in the appearance of the item. They know just what they are getting, and they trust that they have chosen the right item before they add it to the cart.
If you are using Magento Enterprise Edition (EE) 1.14.1 (or later) or Magento Community Edition (CE) (1.9.1 or later), you can use this tutorial on the best ways to make custom swatches. (If you are on an older version of Magento, try out Amasy’s Color Swatch Pro extension, which integrates well with their Improved Layer Navigation.)
How to Add Swatches to a Catalog Item
1. Make sure the attribute you want has been created. If not, make it now:
1.a Choose Catalog -> Attributes -> Manage Attributes
1.b The attribute must have the following properties:
- Scope = Global
- Catalog Input Type for Store Owner = Dropdown
- Apply to = Configurable Product or All Product Types
- Use to Create Configurable Product = Yes
2. Follow these steps to create an Attribute Set that has the options you want (such as yellow, red, blue etc.)
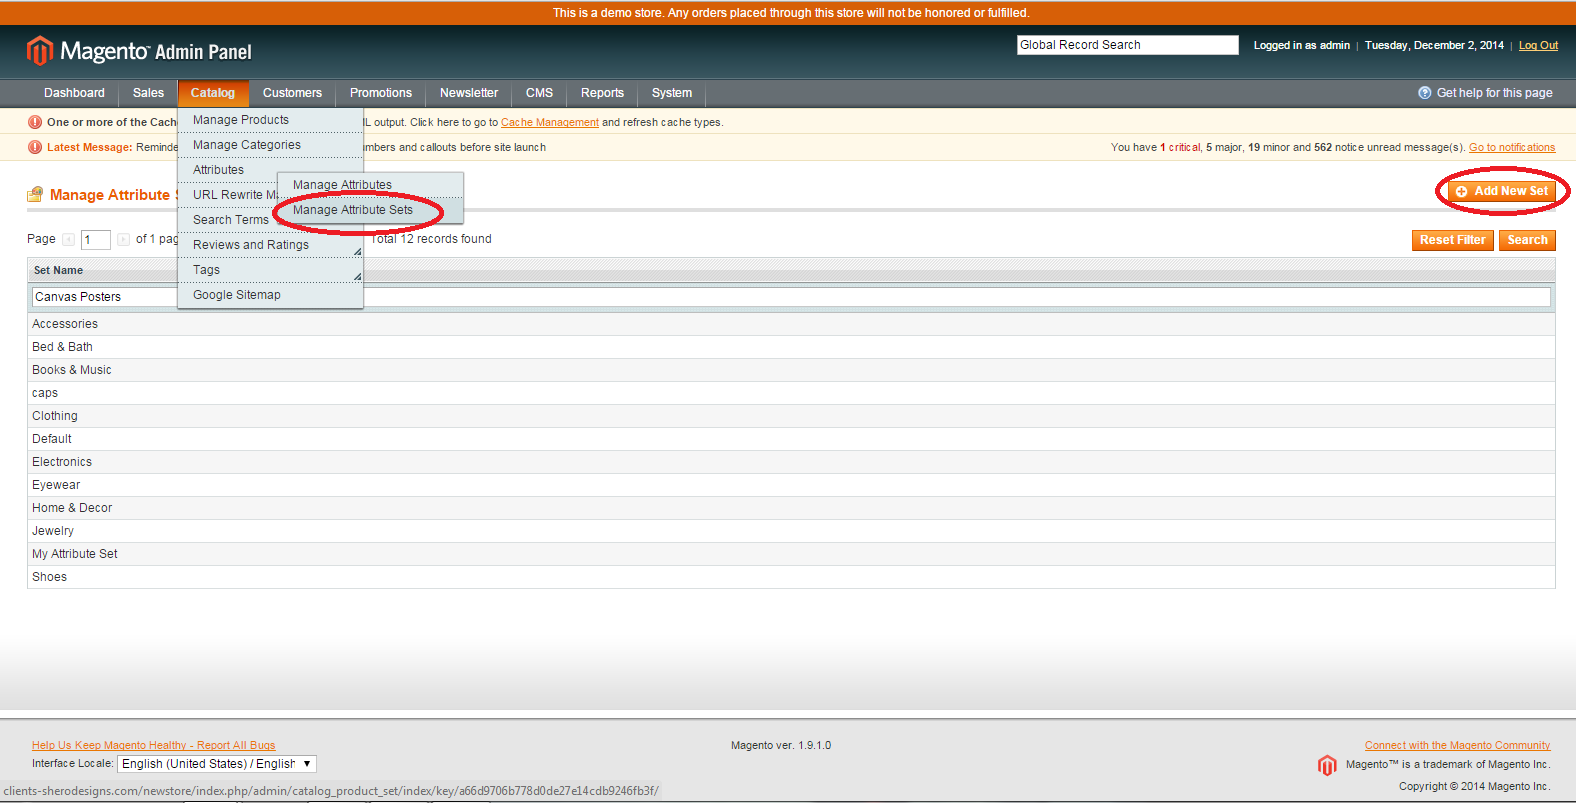
2.a. Catalog -> Attributes -> Manage Attribute Set “Add New Set”
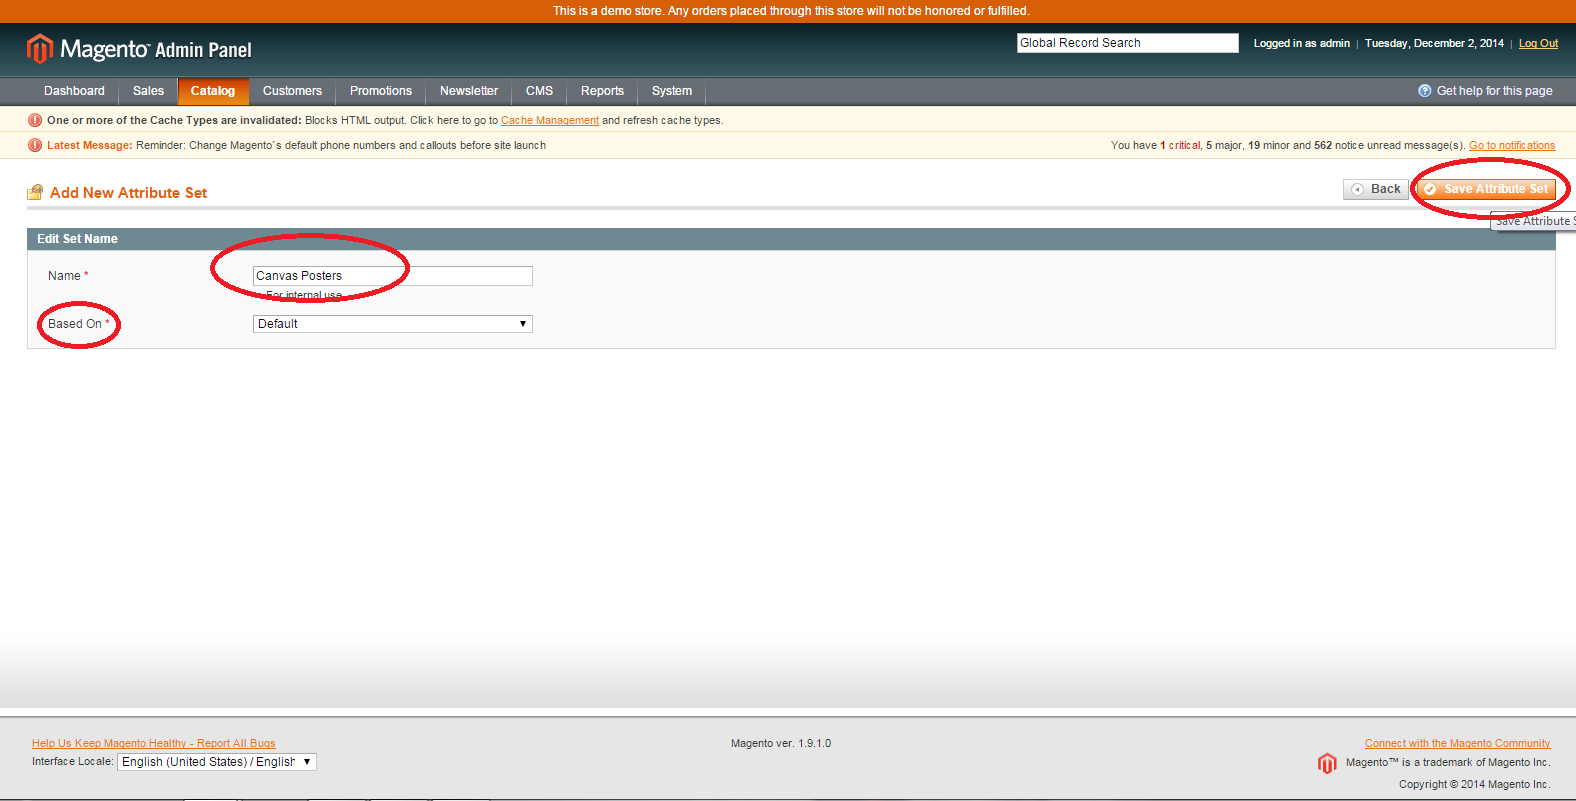
2.b. Name the attribute set appropriately e.g. “Canvas Posters”. The attribute set can inherit an existing attribute set’s properties (“Based On”). Save the attribute set.
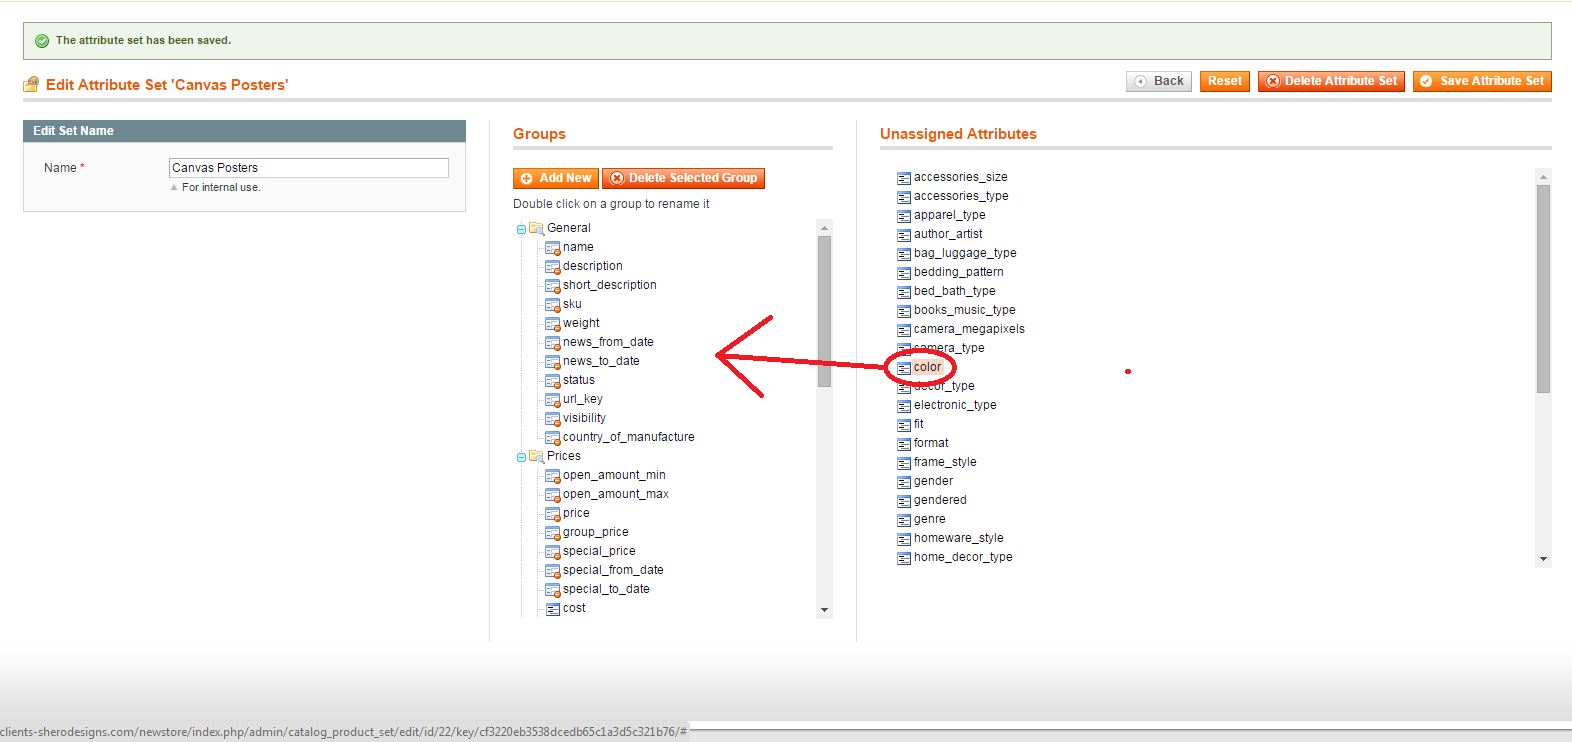
2.c. Next, drag the Attribute created above (or already existing) to appropriate group on the left hand side and then save.
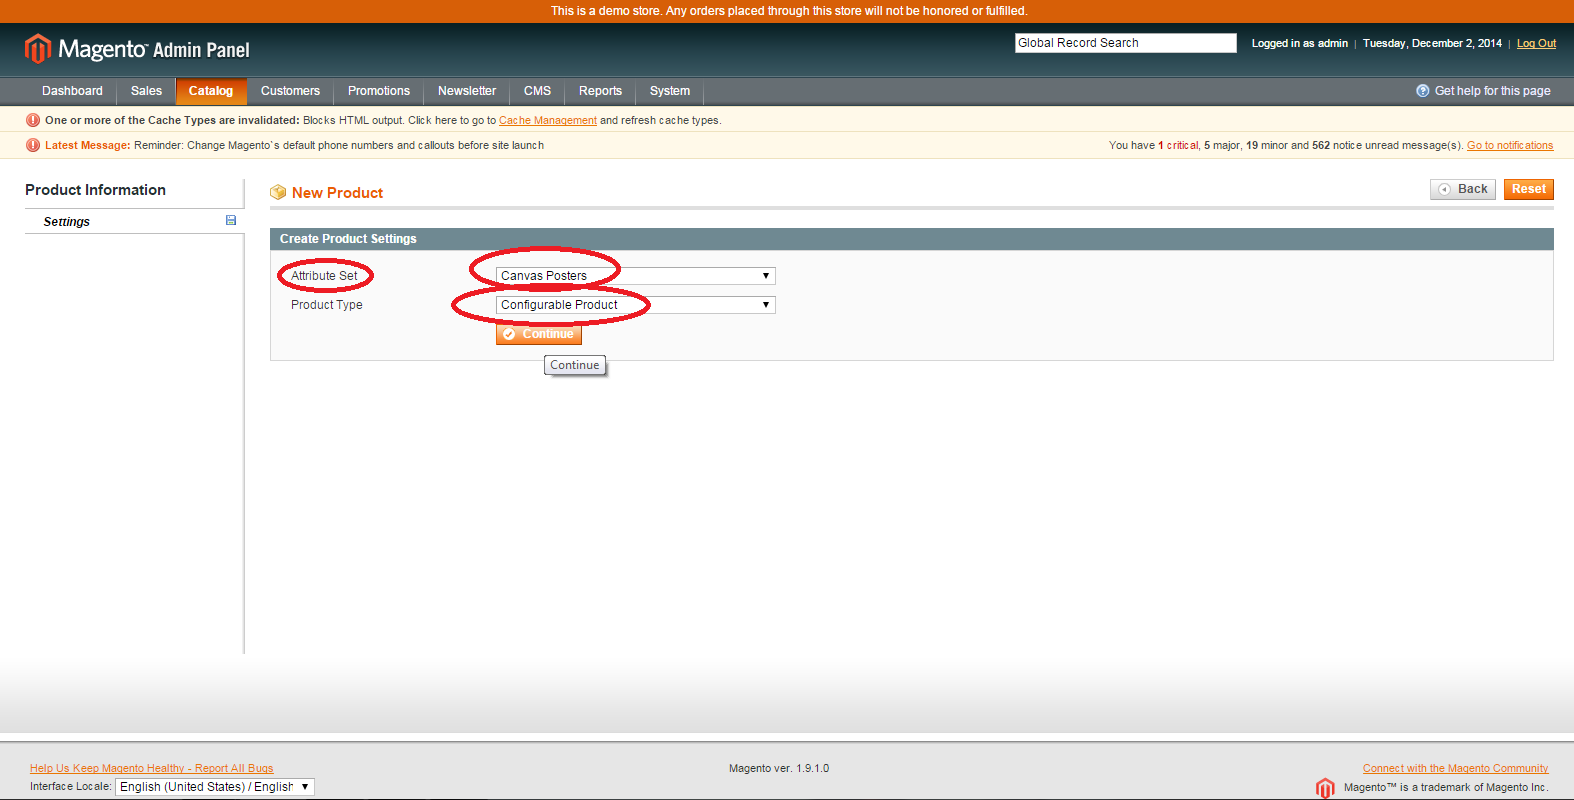
3. Create a Configurable Product (Catalog -> Manage Products “Add Product”)
3.1. Set the attribute set to the Attribute Set you created above, ie. “Canvas Posters”. Set the Product Type to “Configurable Product” and continue.
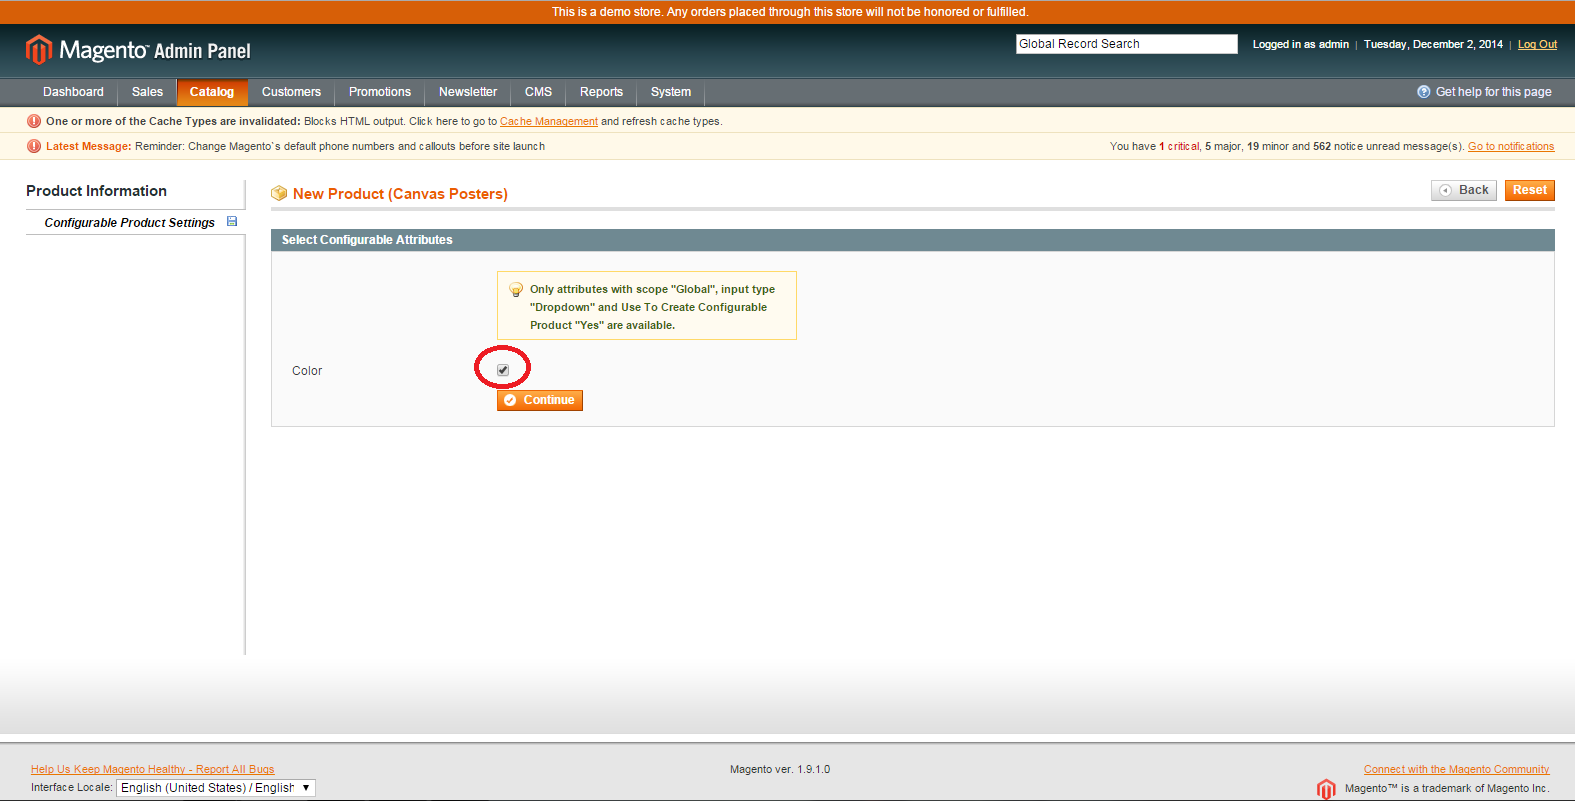
3.2 Tick the boxes for the attributes that you want to be configurable and continue.
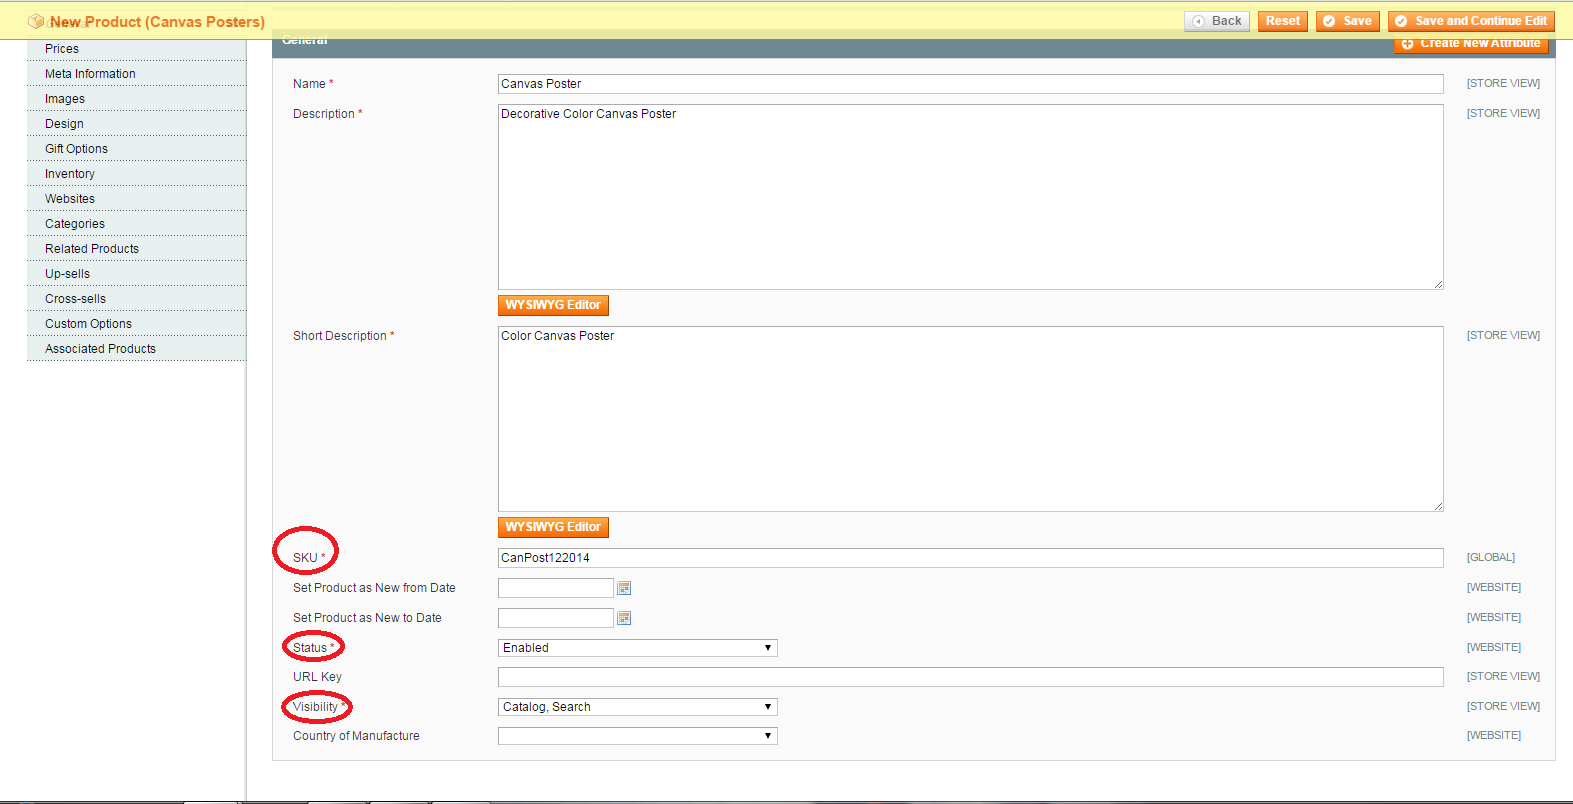
3.3 Next, you will need to create the base product that you want to be configurable. Fill out the following: Name, Description, Short Description, SKU, Status, Visibility (Catalog Search). Click save.
3.4 Prices screen should load next, fill out the Price and Tax Class of the product.
3.5 Select Categories from the side bar. Tick the categories you want the configurable product to appear in.

3.6 If you have more than one store, click Websites and tick the webstores you would like the configurable product to appear on.
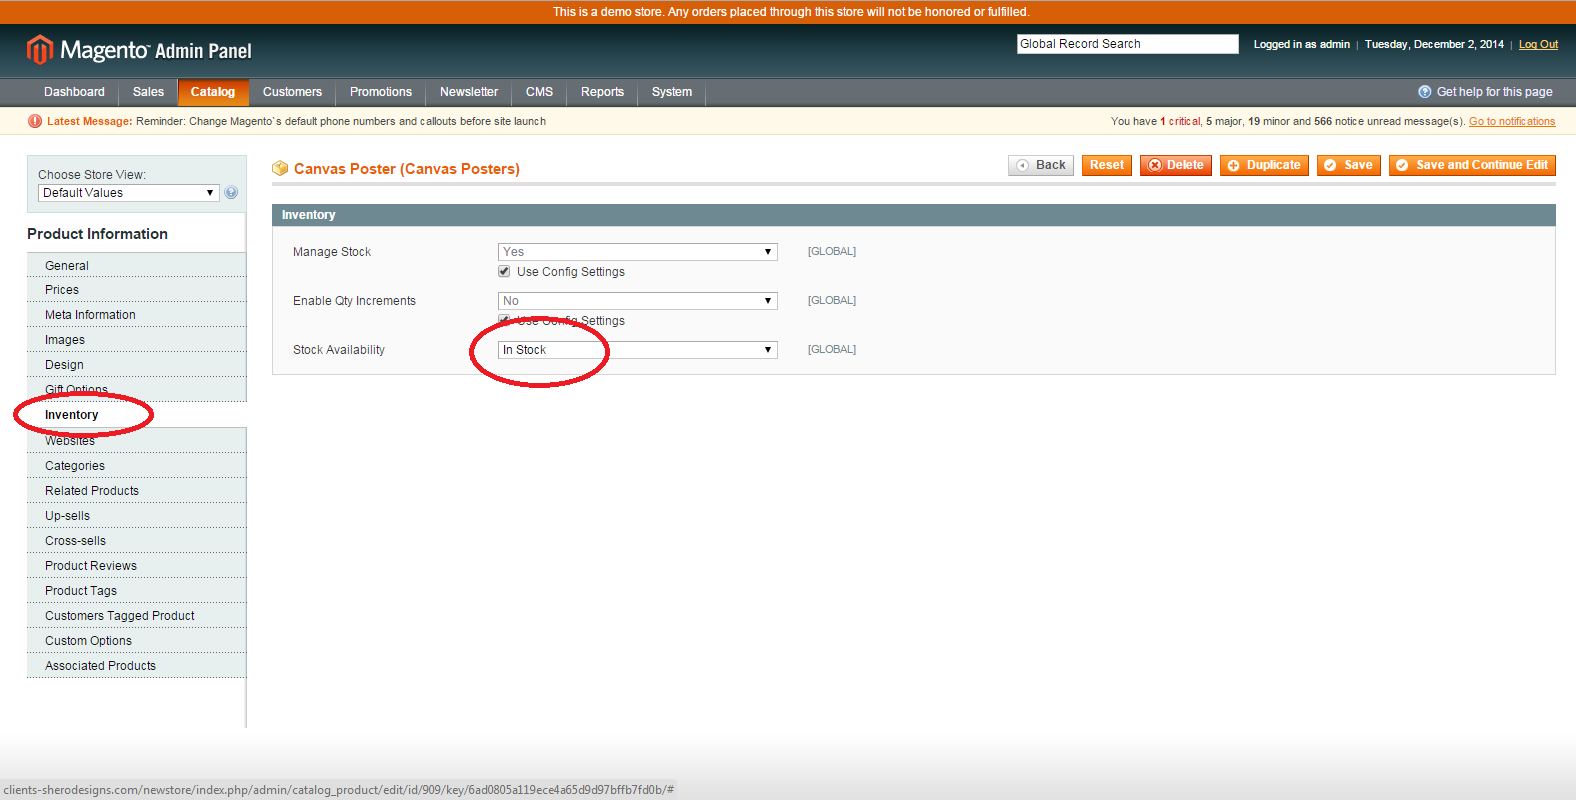
3.7 Click Inventory. At this point you can choose to either have each product managed individually or to have the products all be based off of the same inventory stock (ie., if a manufacturer had a white tee shirt that they dyed many different colors, as opposed to 10 blue, 5 red and 6 green shirts). To do the former, leave the default configuration settings and just change the “Stock Availability” to “In Stock”. Save.
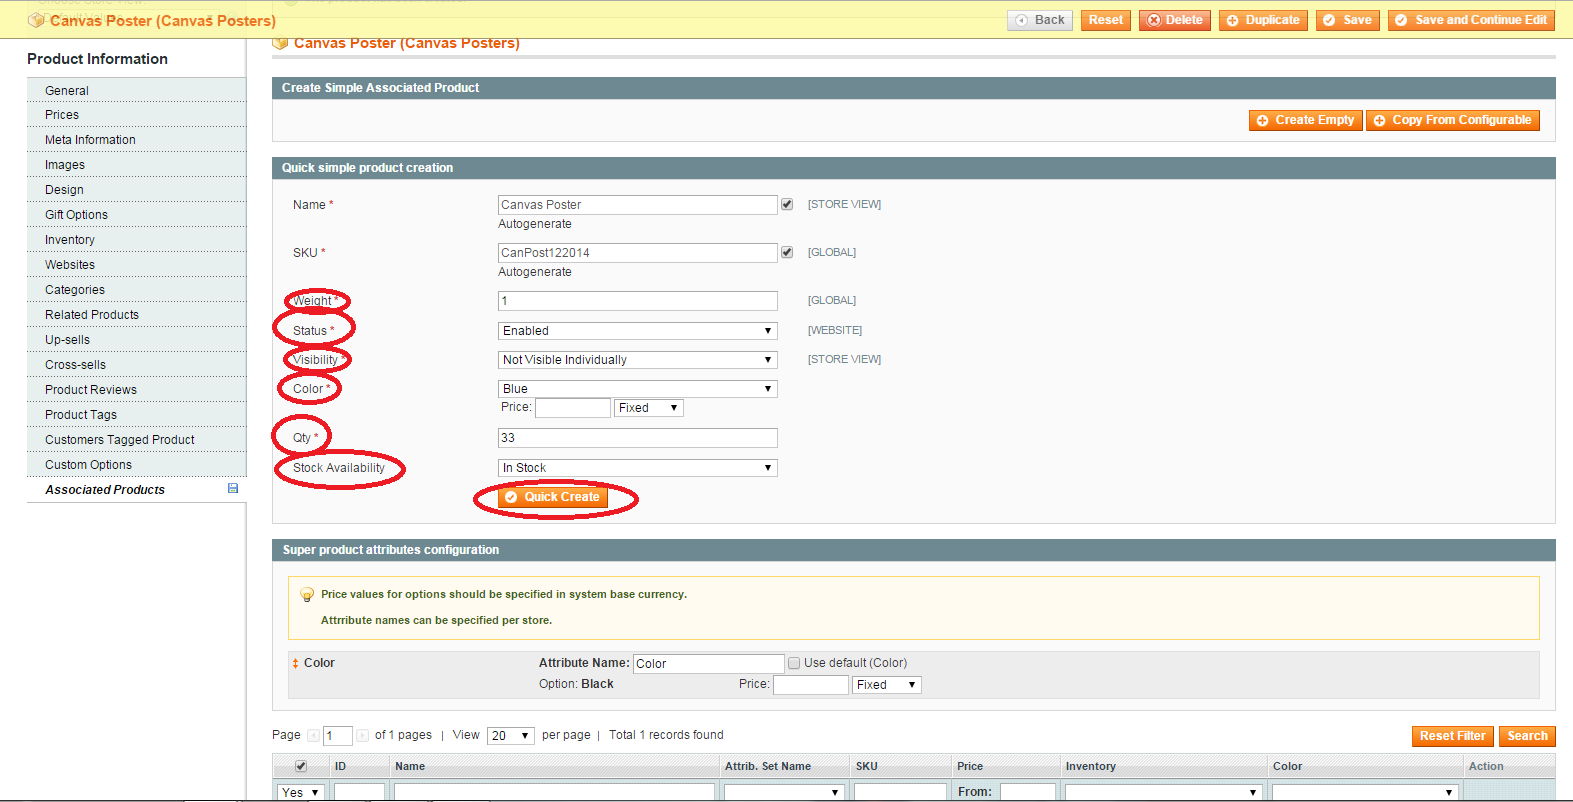
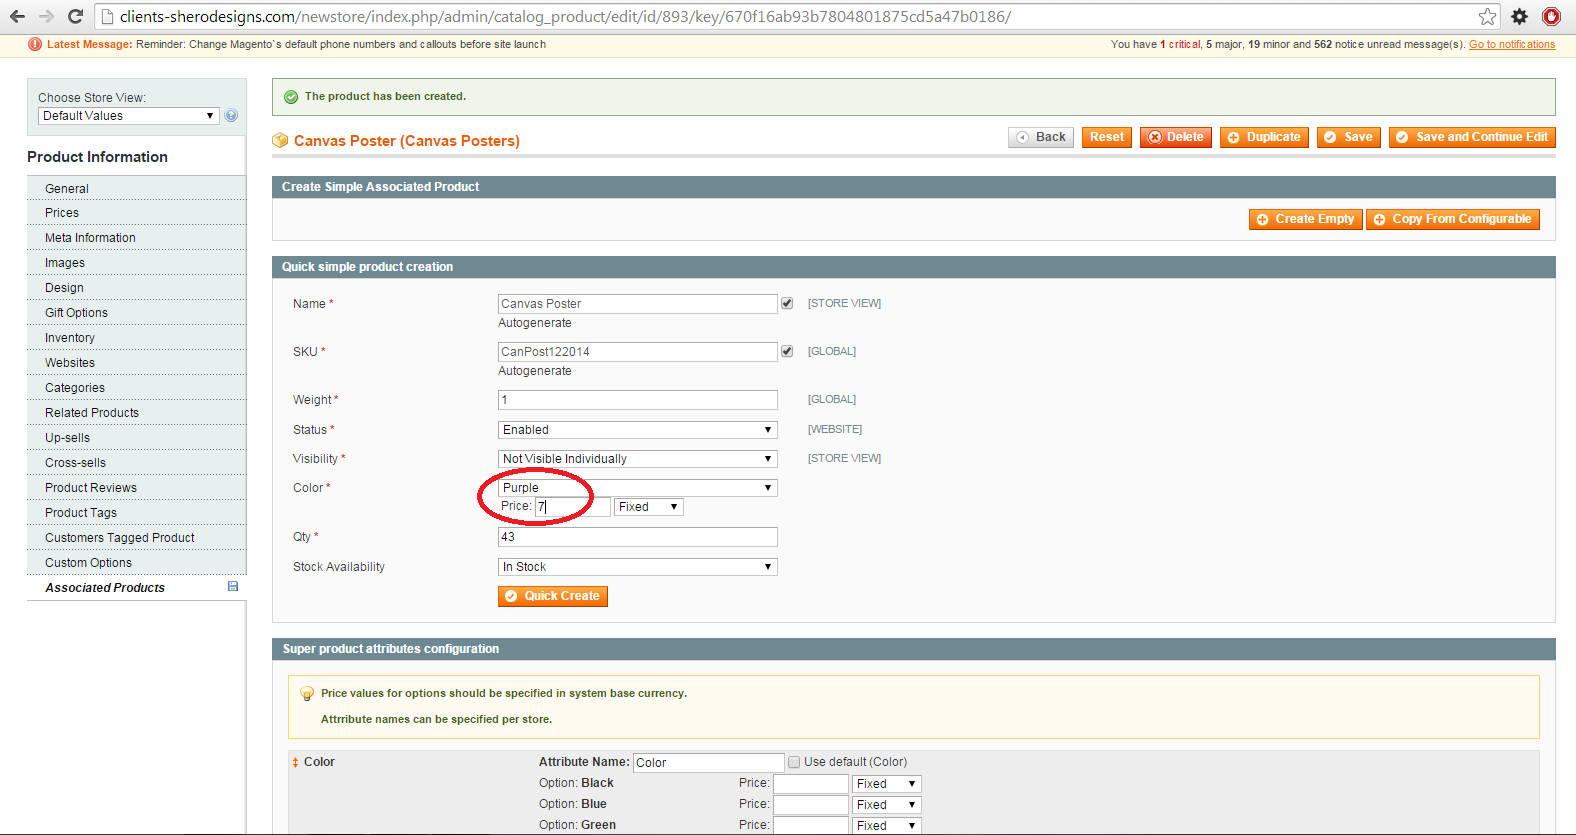
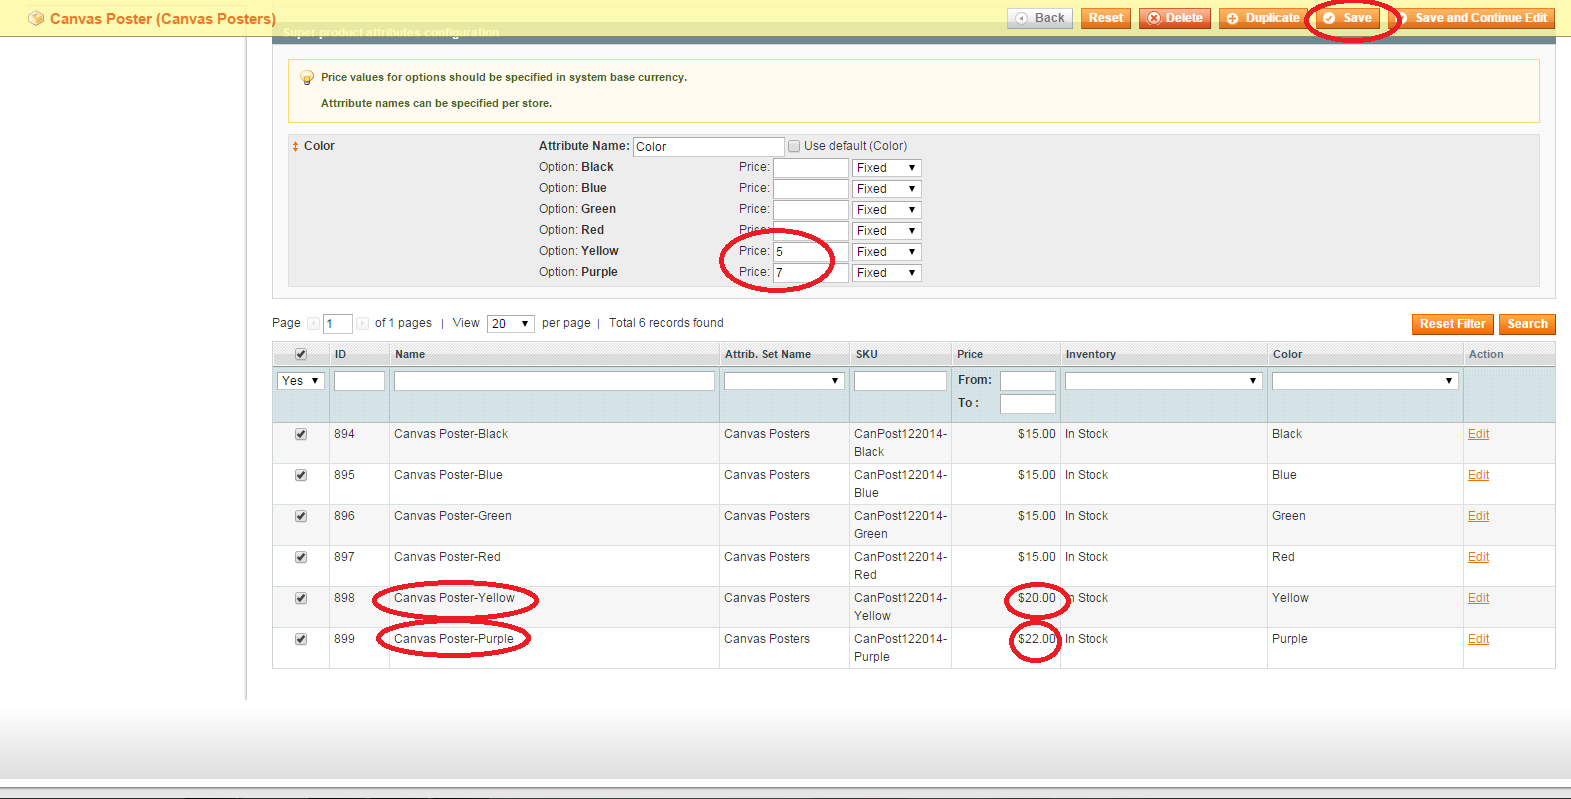
3.8 Next, you’ll need to create the Associated Products. The Name, and SKU for each associated product can be left to “Auto-generate”. Change the Status to “Enabled”, the Visibility to “Not visible individually”, and Stock Availability to “In Stock”. Enter the quantity. In this example, our swatch will be based on color. As such, the color field needs to be selected.
If you enter a price on this screen, it will add that to the price that was defined when you created the base product (picture 2/3). Click “Quick Create”. Add as many items as you wish, then click Save – otherwise the products will show as created in the Manage Products area but not be associated with the Main Product.
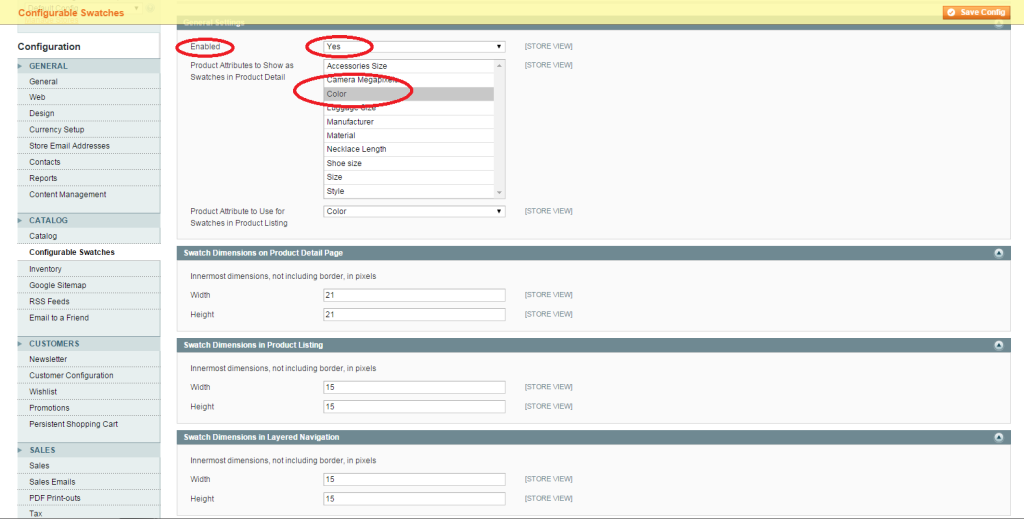
4. Next, you’ll want to enable Configurable Swatches (System -> Configuration). Then under the Navbar header “Catalog,” select “Configurable Swatches.” Make sure that “Enabled” is set to “Yes”. Also make sure that “Product Attributes to Show as Swatches in Product Detail” includes the attribute that you are using. (In this example, it is color.) Save the Config.
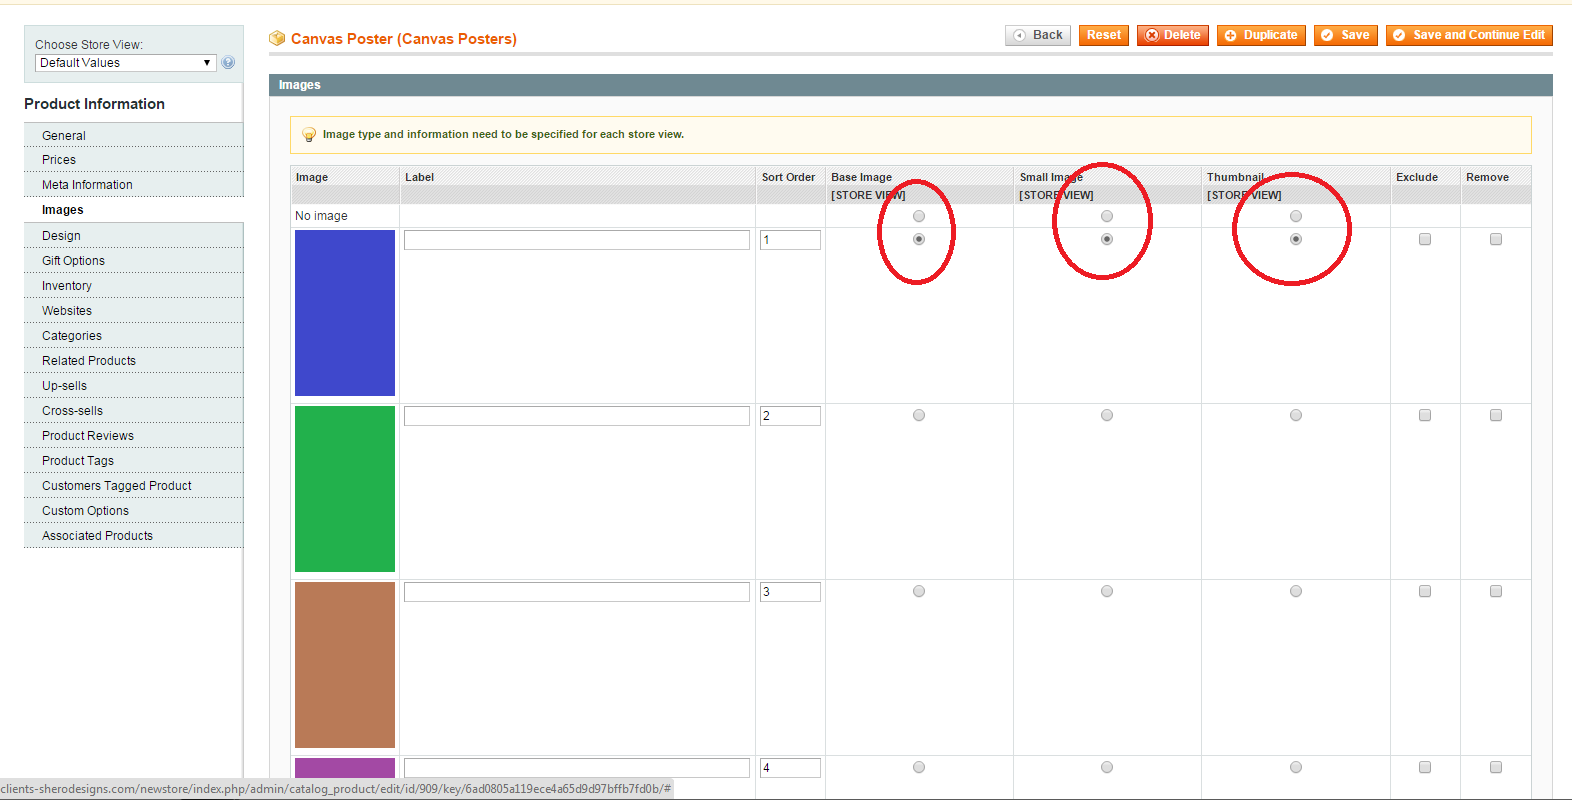
5. Add the swatches in. Go back to Catalog -> Manage Products -> (The Main Product You Created) -> Images
5.1 Upload the images that you want for the swatches. The images should be a .png file with the word -swatch afterwards — for example, Black-swatch.png or Blue-swatch.png
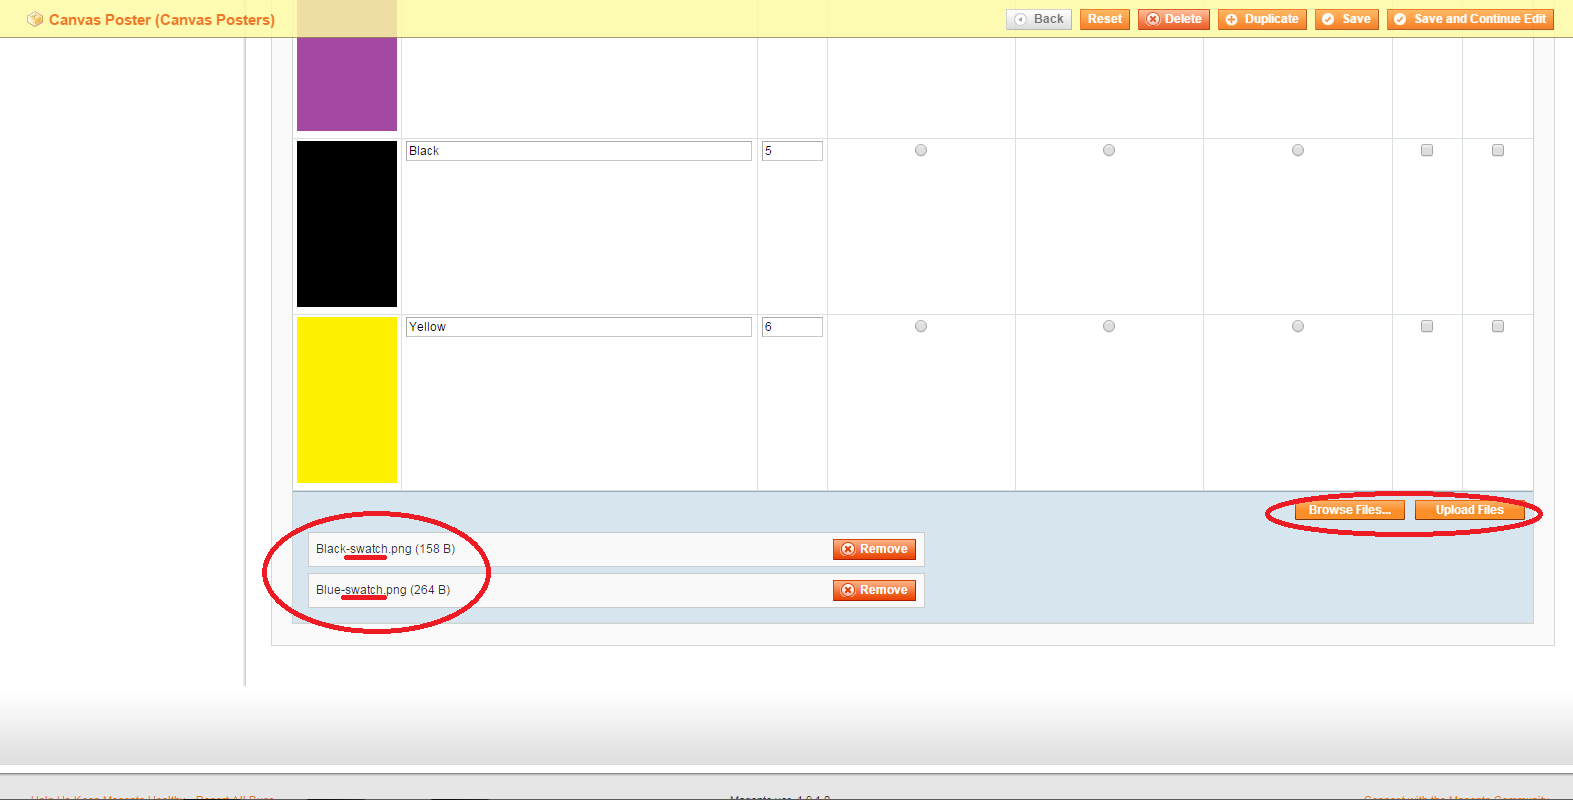
5.2 Set one of the images to defaults/depending on needs.
5.3 Label each image swatch as shown below. This will allow for changing of the product as a specific color is selected while viewing.
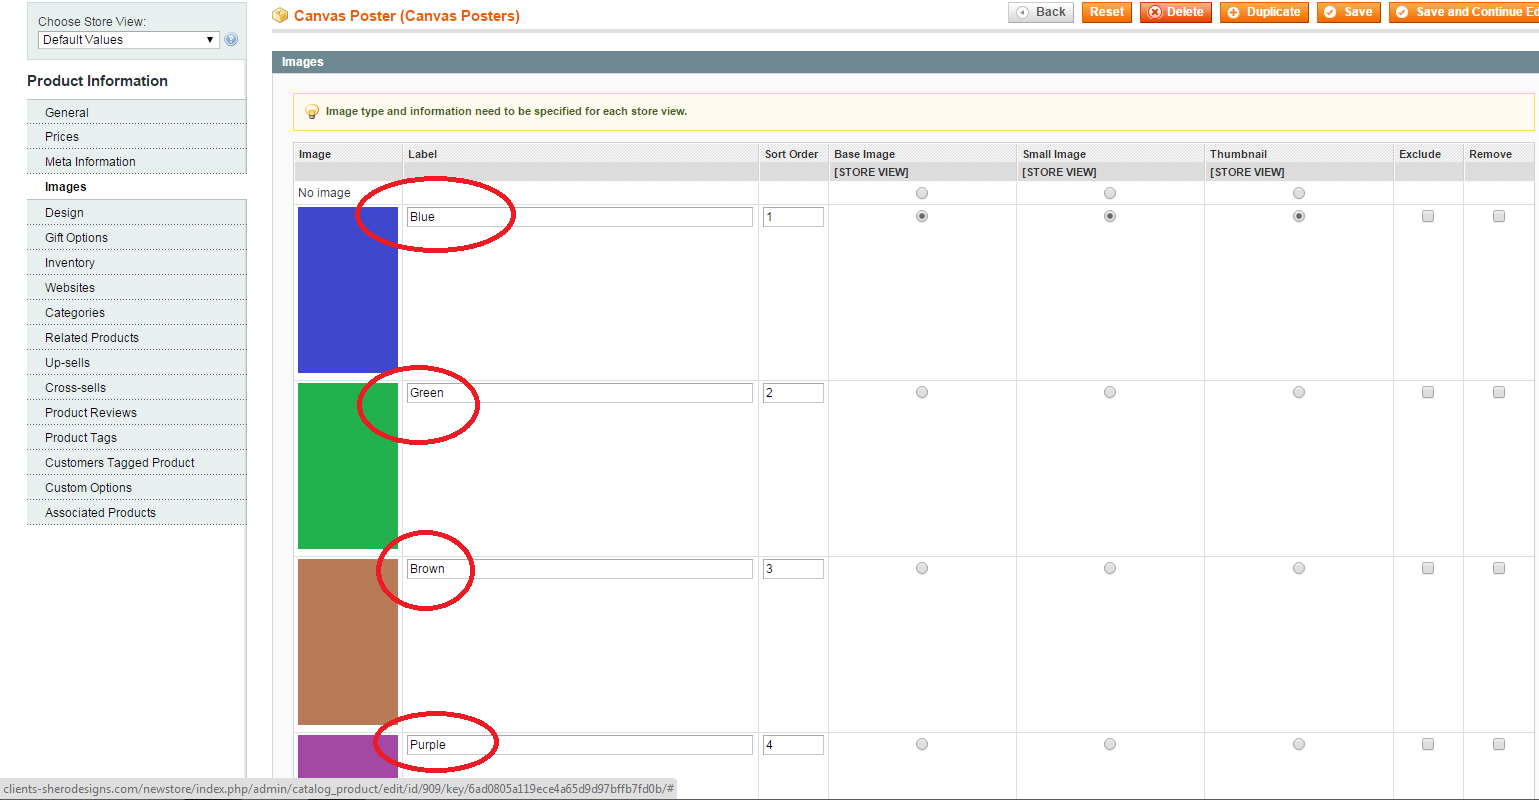
5.4 Save.
6. Re-index and clear the cache.
7. Repeat these steps for set of swatches you need.
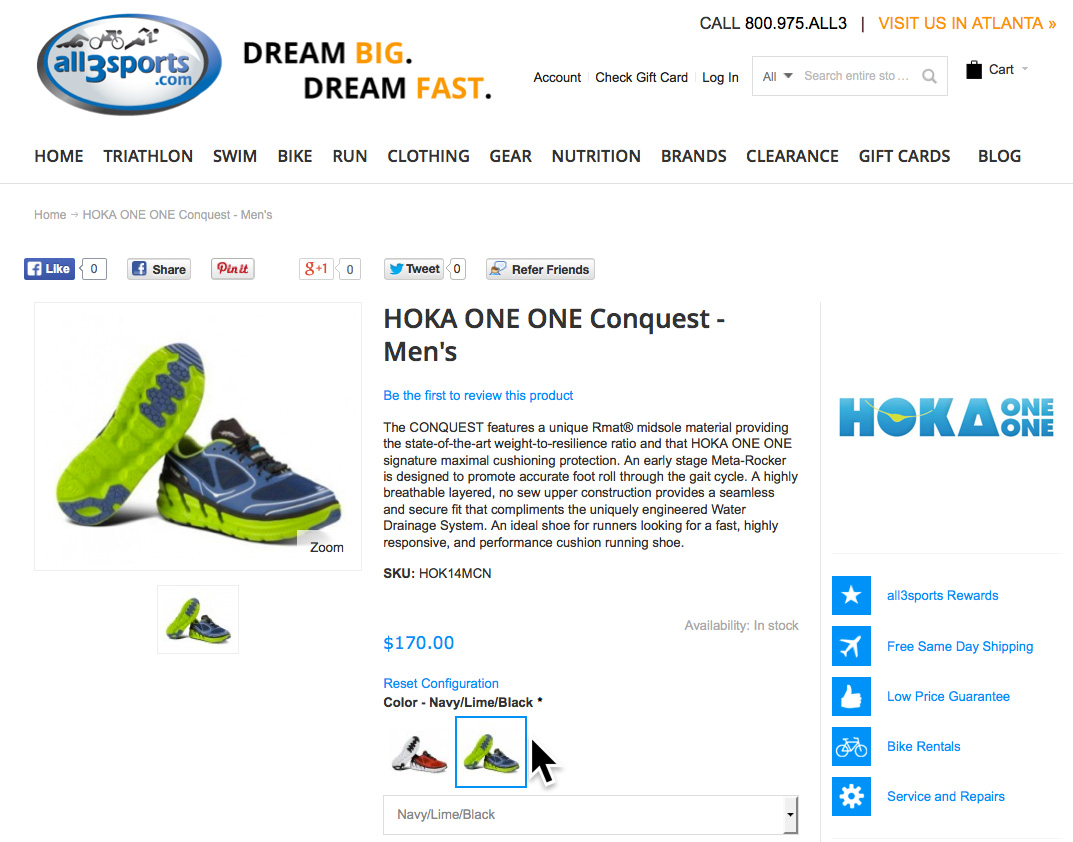
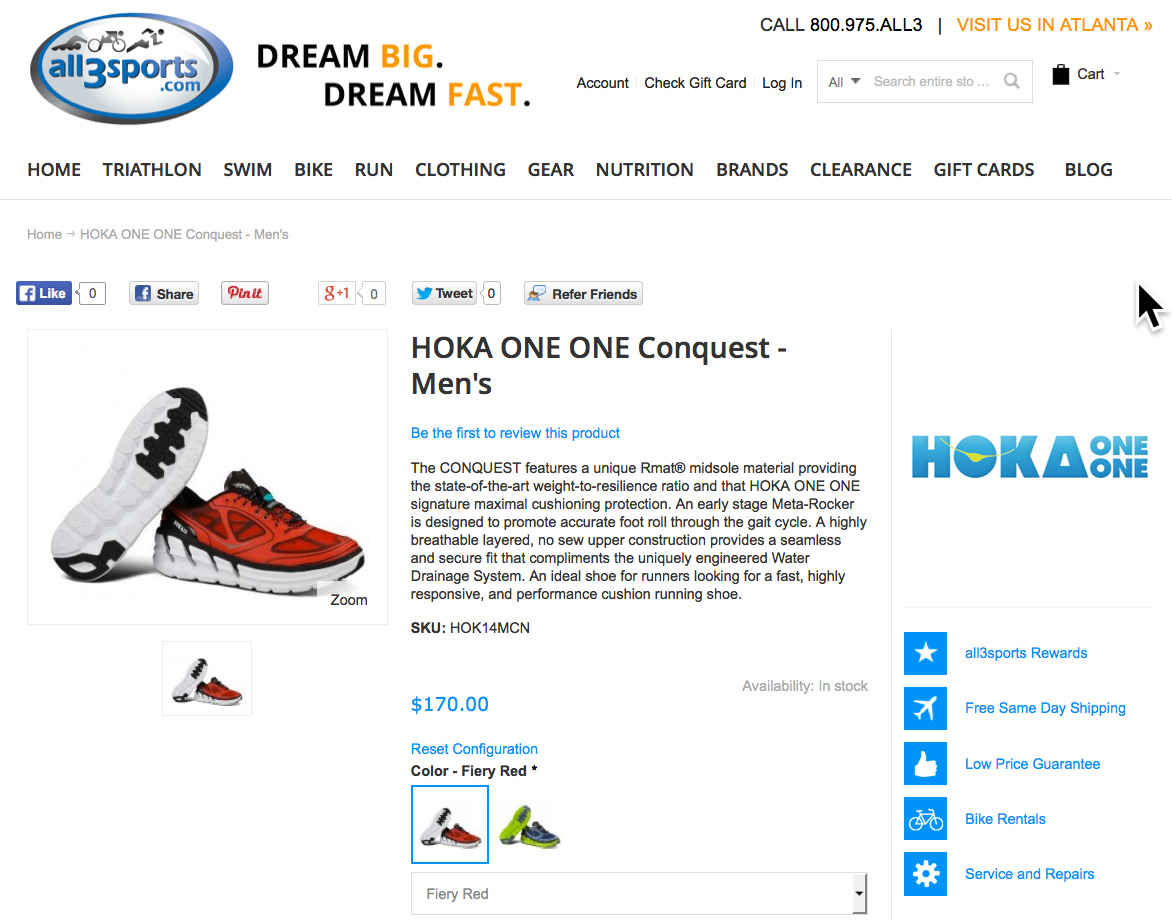
Bonus tip: With swatches, you are not locked into just showing a solid colors. On the All3Sports.com website, the products are typically multi-colored. This high-end sports ecommerce website has an actual picture of the products in the swatches area. Check out these screenshots:
Magento Development Lead