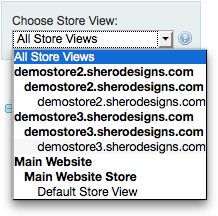
In the first Magento Tutorial part of this series, you learned how to set up a multi site store. At this point, it is important to set up custom child themes so each store can be represented with its own design and front end functionality. In order to set this up properly, you need to visit the admin and choose the appropriate store view. See the screenshot below:
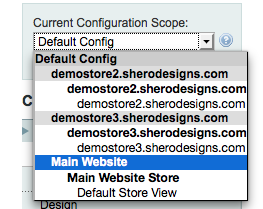
Once you select your store view, you want to visit Configuration –> General –> Design on the left side menu panel, as shown below:
If you look at the screenshot below, you will see the ‘design’ section that is referencing ‘demo store 3’ in our multi site store.
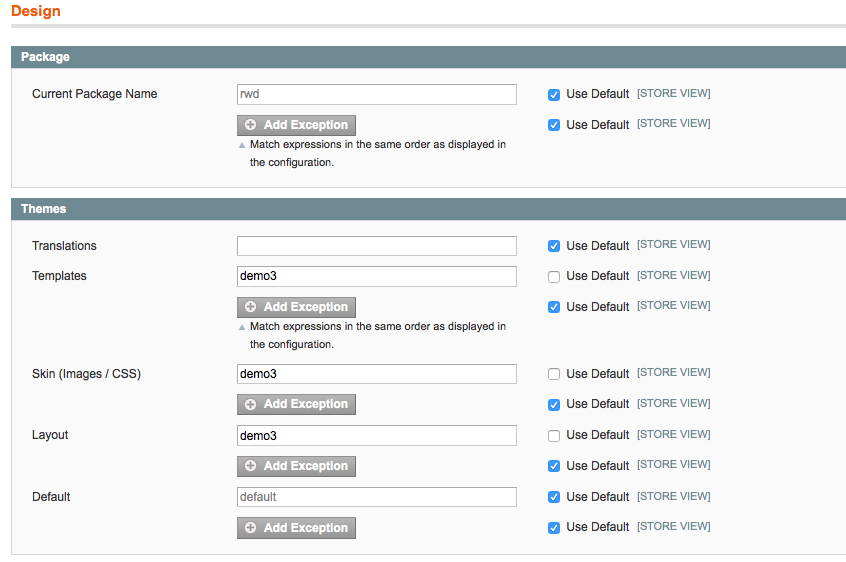
You will notice that the ‘package’, which is the folder that contains all of the child theme folders, is ‘rwd’. Rwd is based on the Magento custom theme that ships with Magento Community and is, by default, referenced with ‘package’ rwd and ‘theme’ ‘default. Therefore, the default RWD theme is located in:
app/design/frontend/rwd/default
Since we are customizing the demo 3 store view with a custom theme, we want to create a copy of that theme and place it in:
app/design/frontend/rwd/demo3
We do the same with the corresponding skin files:
skin/frontend/rwd/demo3
Now, the one important thing to note with all of this is that you do not literally have to copy all the contents of rwd/default into rwd/demo3. You can simply push only the files you would plan to update into that child theme. By setting the ‘package’ field to ‘rwd’ you are telling it which main folder your child theme is stored in. You will also notice the following fields:
- Template
- Skin
- Layout
In this example, we assign a value of ‘demo3’, which is the child theme, for all three of those options. In the ‘default’ field, we enter the word ‘default’. What this basically does is tell Magento “If you cannot find any template, layout or skin files in our child theme, look for ‘rwd/default’ for those files. The ‘Default’ text field is asking ‘where does Magento look in case there is nothing in the child theme’ and the value, ‘default’, in this example is the name of the folder under the ‘package’ ‘rwd’, i.e rwd/default, which is the initial theme that comes with Magento.
So if you do not have a header file here:
app/design/frontend/rwd/demo3
Magento will find it here:
app/design/frontend/rwd/default
So make sure that each store view that you edit includes a corresponding child theme value listed in the layout, skin and template fields and then save the configuration. This will ensure your store views load the proper front end design and functionality.
Updating CMS Content
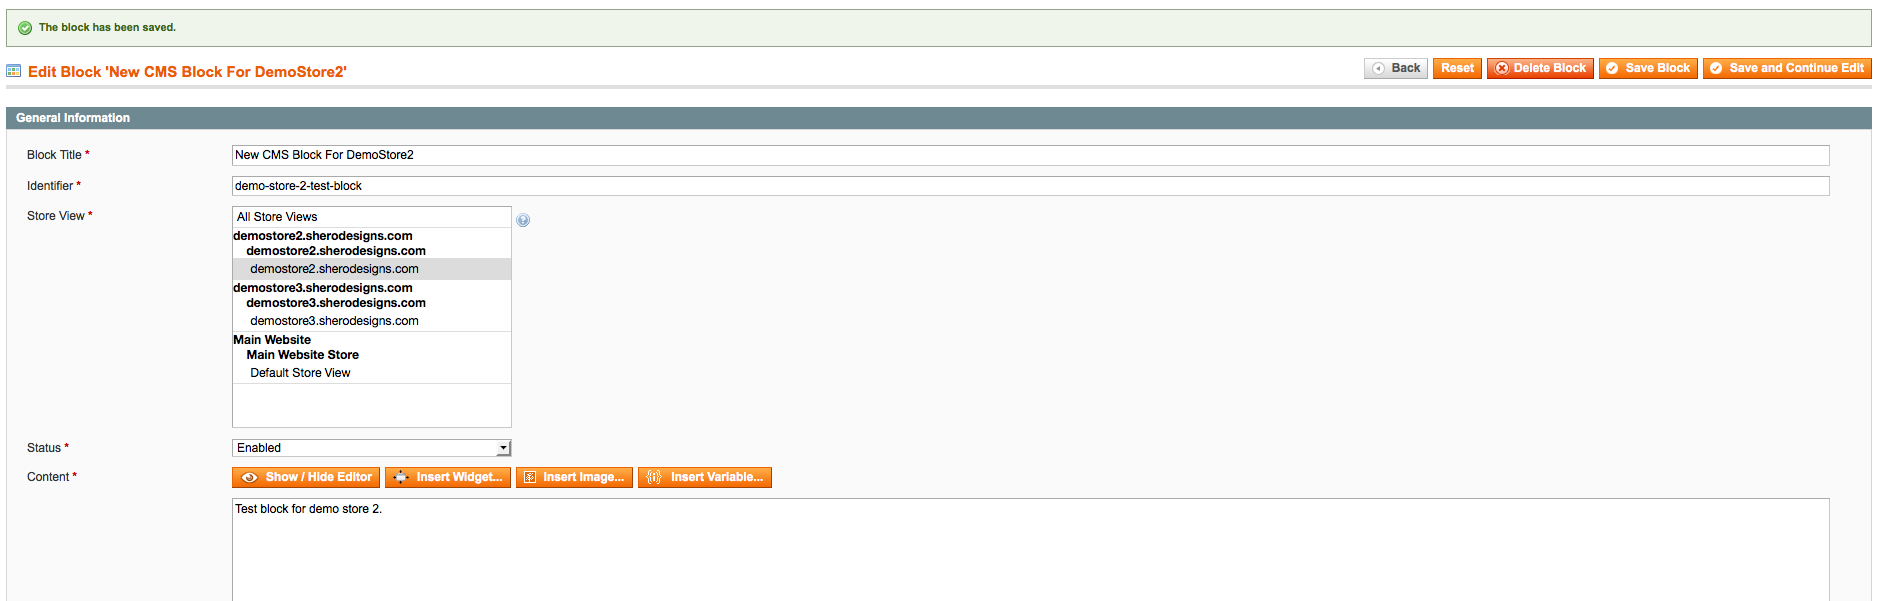
In order to update CMS Page content for each unique store view, you simply visit CMS –> Page or CMS –> Static Blocks once you have chosen the store view to visit. Any update you make for this page will be updated only for that website. See below:
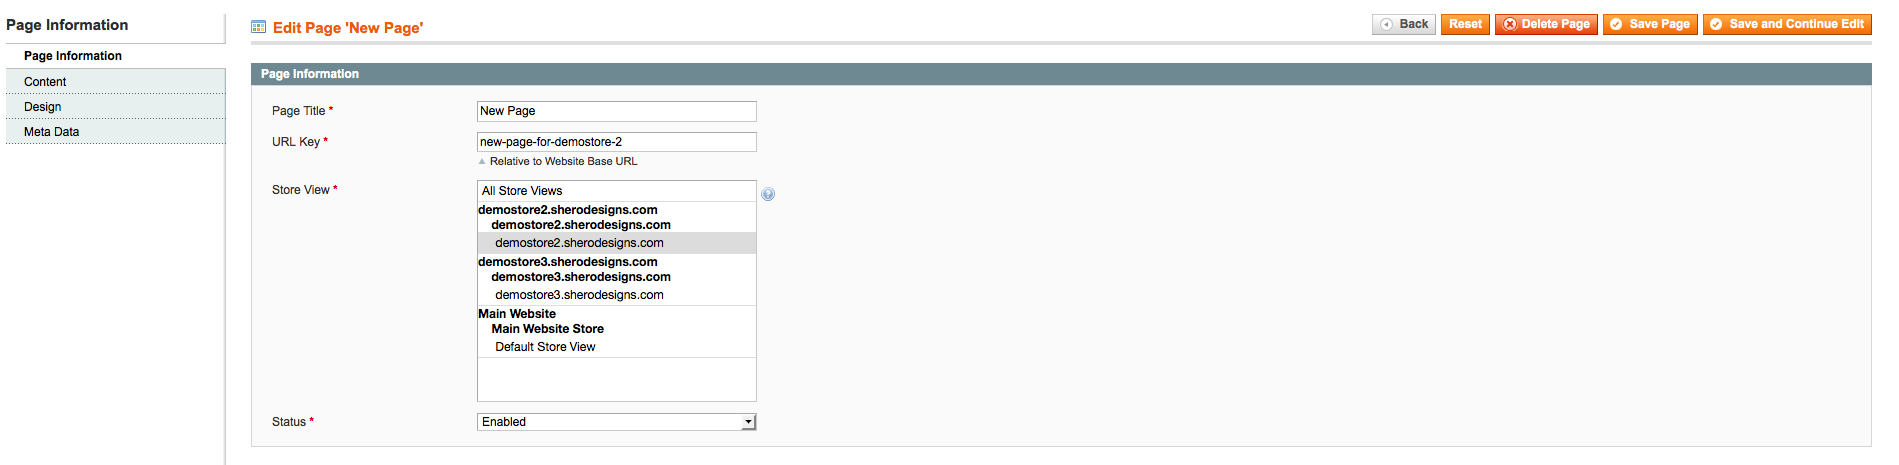
Adding a new CMS Page to a specific store view is just as easy. Go to CMS –> Pages and add a new page. You will have an option to choose store view. See below:
You can load that url in your browser, based on the url that you set for that page, and it will load along with the child theme associated with that store view. You can even do this with products and categories. For categories, go to Catalog –> Manage Categories and you click on a category. All you have to do, at that point, is choose a store view you wish to add a new category for, or one to edit a category for, and Magento will save those values for that particular store. See below:
Setting Up Products And Categories
If you would like to use this same logic for products, so only certain products load for each store view, just go to Catalog –> Manage Products and, when editing a product, click on the ‘websites’ tab and assign a specific value for that product. This will ensure Magento only loads that product for that store view. Otherwise, by default, it will be available for all store views. You can even choose store view before editing a product:
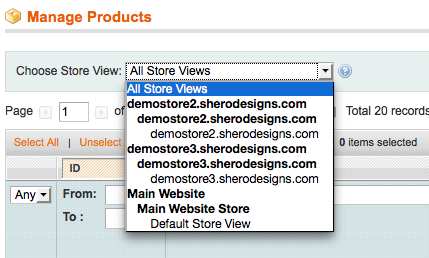
In this example, I chose the demo store 3 view, so now my Manage Products page shows only one product, instead of the 20 that were originally loaded into this magento install. Below, you will see two screenshots. One shows all 20 products associated with all 3 stores. The second screenshot shows the one product that loads when you choose the Demo 3 store view.

Once you have your multi site store set up, take the time to set up some unique categories, products and CMS content for each store view. Get comfortable with the process and, before you know it, running a multi site store will be easier than you imagined.
Magento Development Lead